How to Add Google Analytics to WordPress: A Step-by-Step Guide

May 5
Understanding your website's visitors is fundamental for growth. Who are they exploring your site? Where did they come from? What content captures their attention? Answering these questions allows you to make data-driven decisions, refine user experience, optimize content, and ultimately achieve your website's objectives. Google Analytics is the industry-standard tool for this – a powerful, free platform offering deep insights into your website traffic.
While figuring out how to add Google Analytics to WordPress might seem technical, it's a process that's quite achievable with the right guidance. This guide will walk you through setting it up step-by-step, covering the most effective and common methods used today.
Why Connect Google Analytics to WordPress?
- Know Your Audience: Discover visitor demographics, interests, geographic locations, and the devices they use.
- Pinpoint Traffic Sources: Identify how visitors find you (e.g., Google search, social media platforms, referral links, direct visits).
- Evaluate Content Effectiveness: See which pages and blog posts are most popular and engaging.
- Analyze User Journeys: Understand how users navigate through your site, session durations, and bounce rates.
- Track Key Actions: Measure goal completions, such as contact form submissions, downloads, or e-commerce purchases.
Step 1: Set Up Your Google Analytics Account & Property
First, you need a Google Analytics account and a specific "Property" set up for your website. This will generate the essential "Measurement ID". You can use an existing Google account (like Gmail).
- Sign Up/In: Visit the Google Analytics website and click "Get Started" or sign in with your Google account.
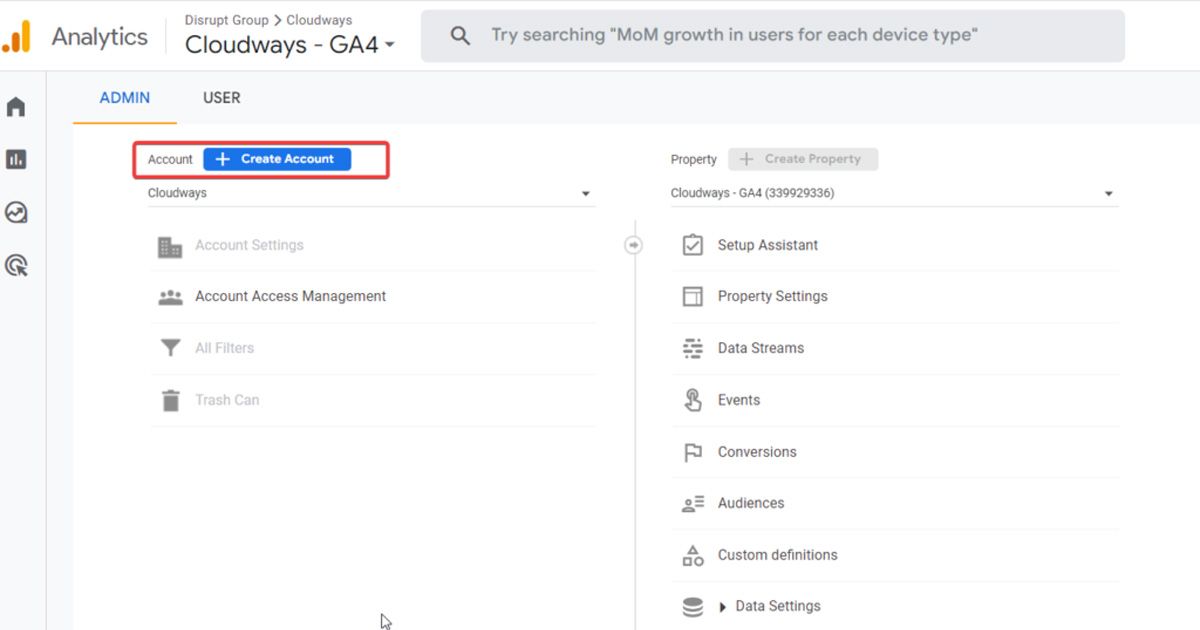
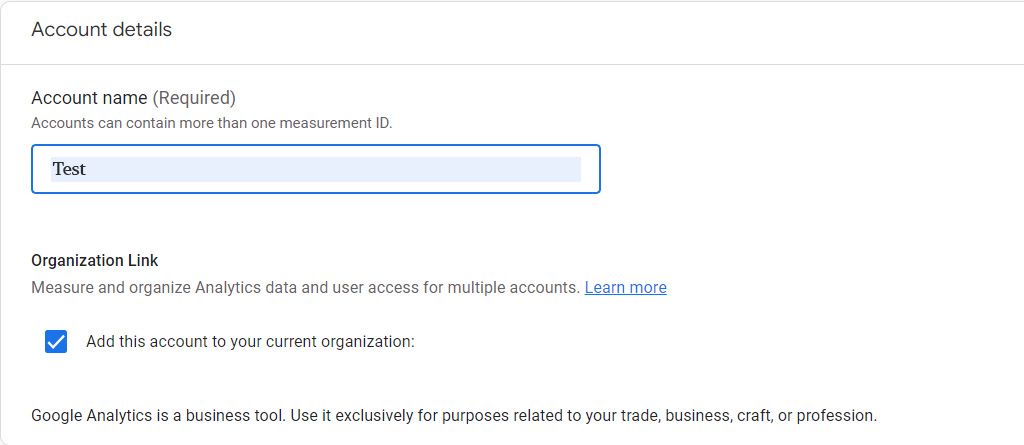
- Create an Account: If you're new to GA, enter an "Account name" (e.g., Your Business Name) and adjust data-sharing preferences. Click Next. (If you already have GA accounts, navigate to the Admin section, and click Create Account).
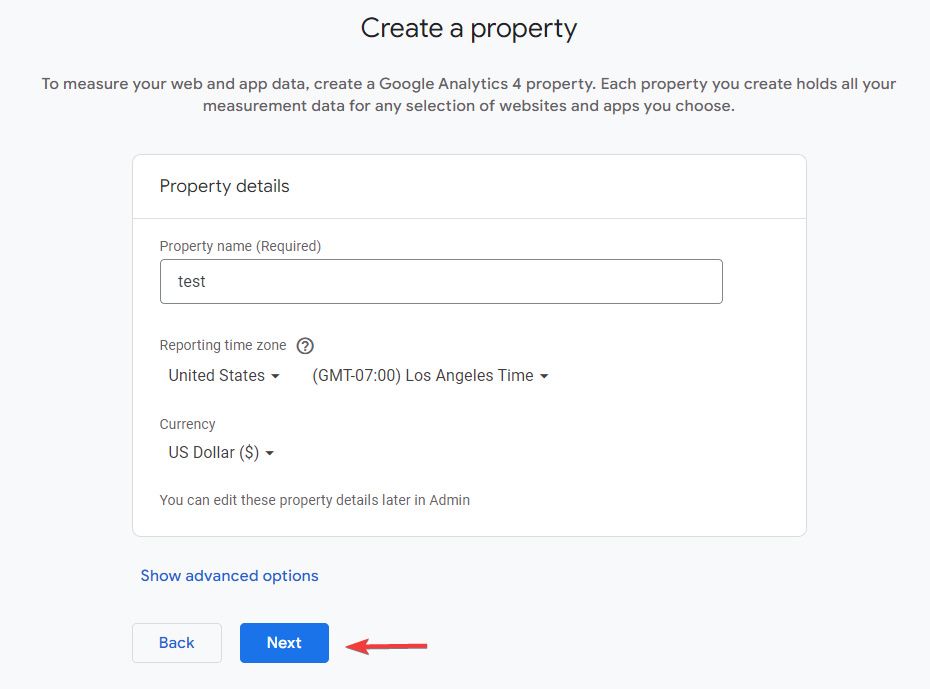
- Create a Property: This represents your website within GA.
- Property Name: Use your website's name or a clear identifier.
- Reporting Time Zone: Choose the time zone relevant to your operations.
- Currency: Select the primary currency you operate in.
- Click Next.
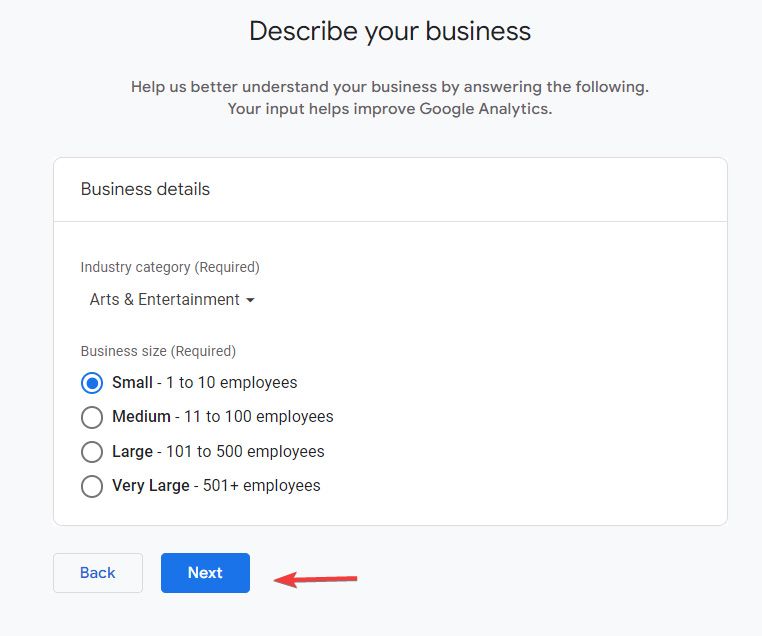
- Business Information: Provide details about your industry category and business size. Click Next.
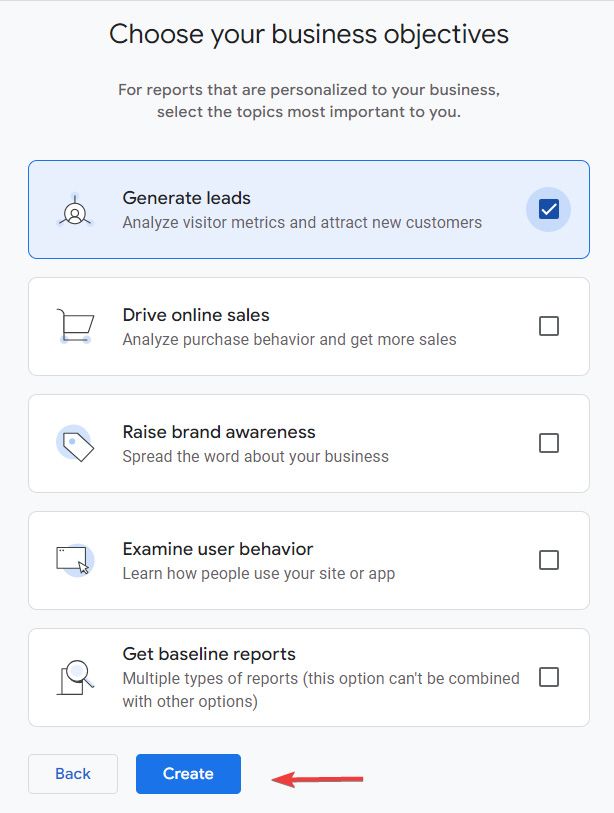
- Business Objectives: Choose the goals you aim to achieve with GA (e.g., Measure lead generation, Drive online sales). Click Create.
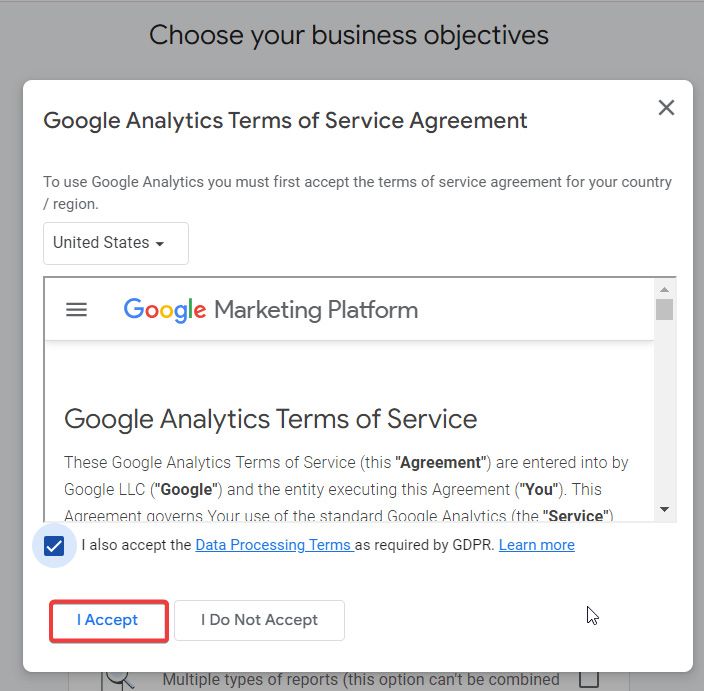
- Accept Terms: Review and accept the Google Analytics Terms of Service Agreement.
- Choose a Platform: Select Web since you're tracking a website.

- Set Up Your Web Data Stream:
- Enter your website's domain name. Ensure you select https:// and type the domain without www (e.g., yourwebsite.com not www.yourwebsite.com).
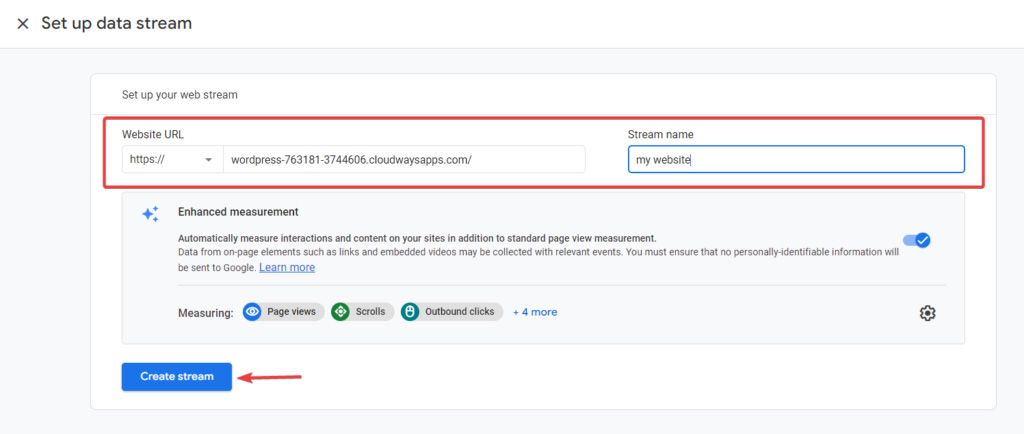
- Stream Name: Provide a logical name (e.g., your website title).
- Click Create Stream.
Step 2: Get Your Measurement ID
Once the data stream is created, Google Analytics provides the necessary details for installation. The key piece you need is the Measurement ID.
- On the "Web stream details" page (or under "Installation instructions"), locate your Measurement ID. It will be in the format G-XXXXXXXXXX.
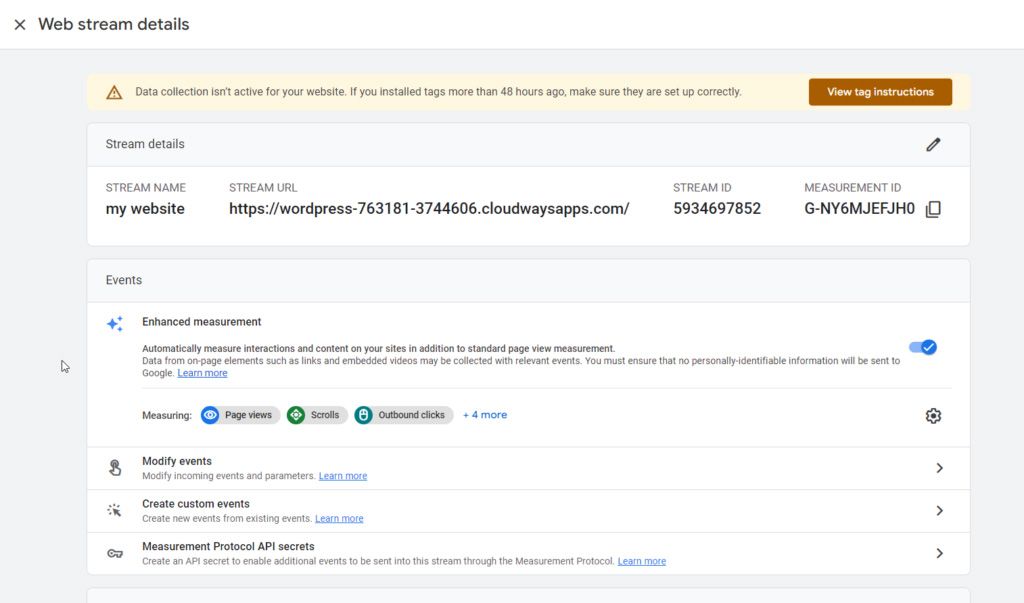
- This ID is unique to your web data stream. Click the copy icon next to it to copy it to your clipboard. You'll paste this into WordPress shortly.
(Note: Google often prompts users to install via methods like their "Site Kit plugin". While Site Kit is an excellent option (covered next), you only need the Measurement ID itself if you plan to use other connection methods).
Step 3: Add the Measurement ID to Your WordPress Site
Now it's time to connect Google Analytics to WordPress using your Measurement ID. Here are the most common methods:
Method 1: Using a Plugin (Highly Recommended for Self-Hosted WordPress)
For most users, especially those with self-hosted WordPress.org sites, using a dedicated plugin is the easiest, safest, and often most feature-rich approach. This avoids editing theme code directly.
- Choose a Plugin: Excellent options include:
- Site Kit by Google: The official plugin from Google. It not only handles how to add Google Analytics to WordPress but also integrates Search Console, PageSpeed Insights, and AdSense data directly into your dashboard.
- MonsterInsights: A very popular and user-friendly choice specifically designed for GA integration, offering easy setup and insightful reports within WordPress.
- GA Google Analytics: A straightforward, lightweight option focused purely on adding the GA tracking code.
- Install and Activate: From your WordPress dashboard, go to Plugins → Add New. Search for your chosen plugin (e.g., "Site Kit by Google"). Click Install Now, and then Activate.
- Connect & Configure: After activation, follow the plugin's on-screen setup wizard. This typically involves clicking a button to connect your Google Account, granting the necessary permissions, and selecting the correct GA Property. Most top plugins automatically find and apply your Measurement ID or provide a clear field to paste it.
Method 2: Using the WordPress.com Built-in Feature (WordPress.com Hosted Sites Only)
If your website is hosted directly on WordPress.com (using their Premium, Business, or eCommerce plans), they offer a simple built-in setting:
- Log in to your WordPress.com dashboard.
- Navigate to Tools → Marketing.
- Click on the Traffic tab.
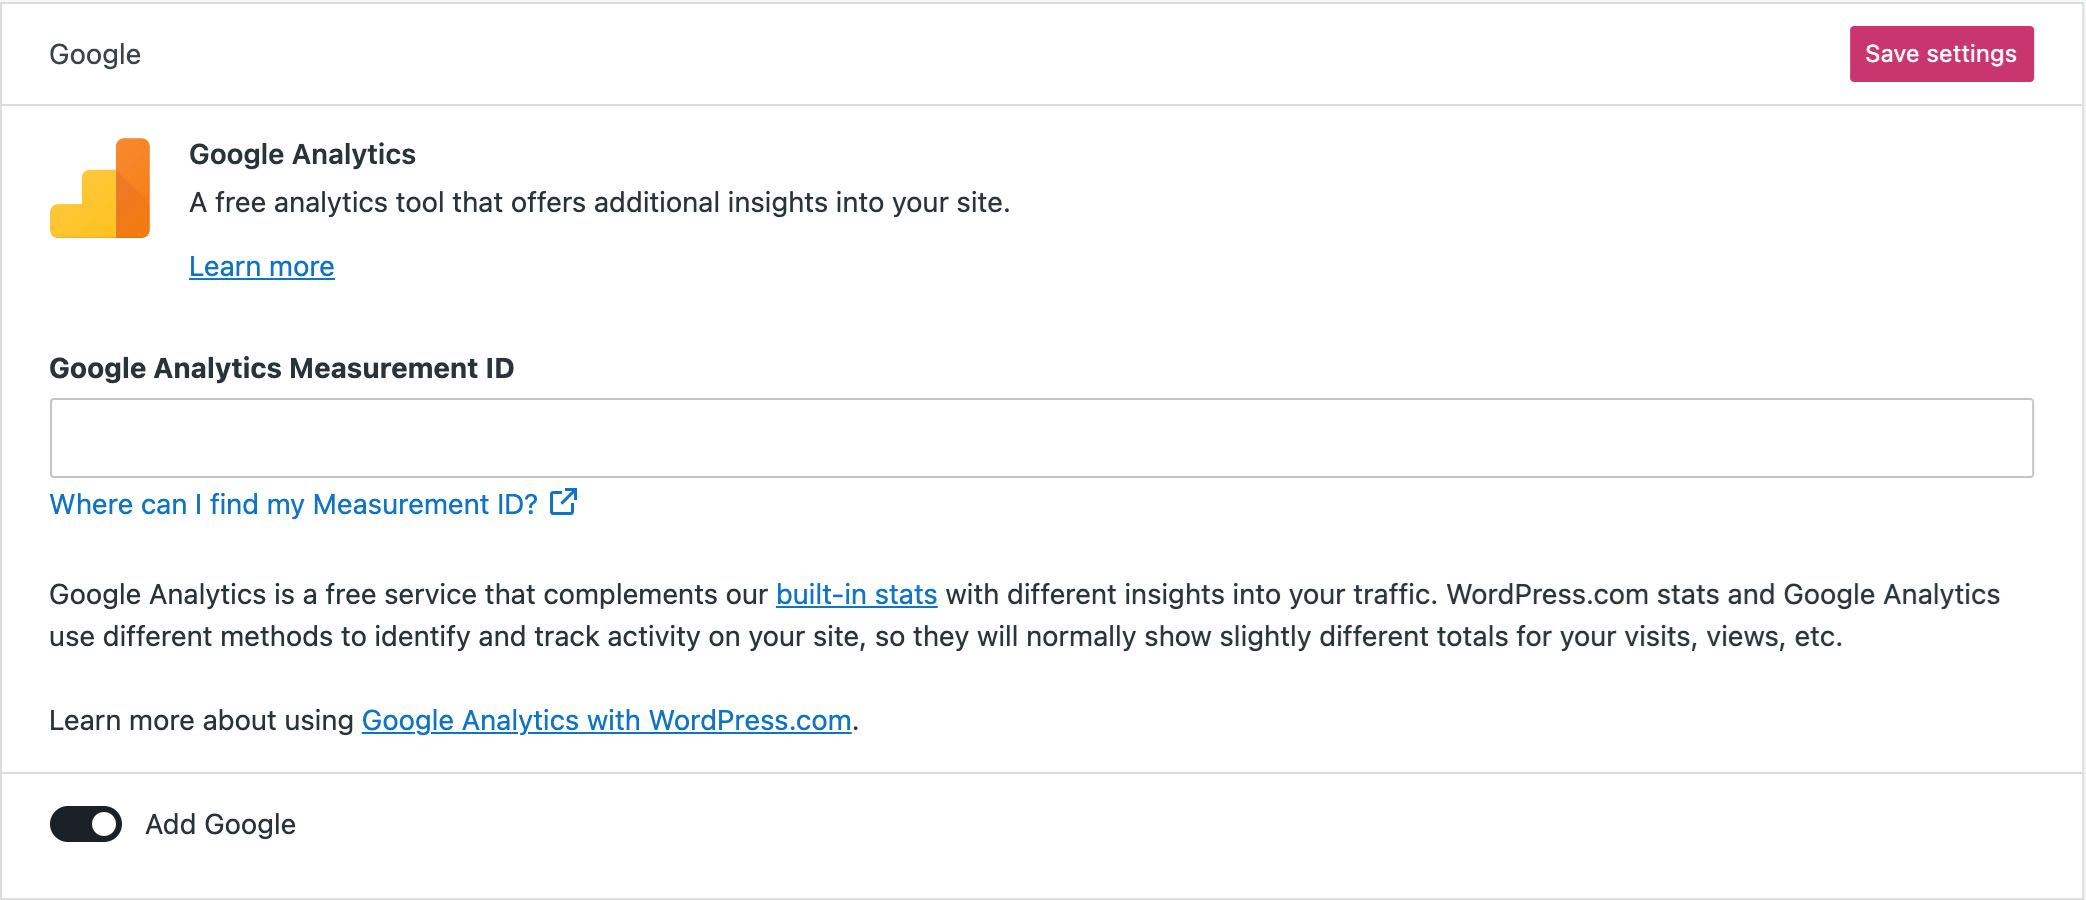
- Scroll down until you find the Google section.
- Locate the field labeled “Google Analytics Measurement ID” and paste your G-XXXXXXXXXX ID into it.
- Click Save settings.
Method 3: Adding Code Manually via Theme Files or Plugin (Advanced)
This method involves inserting the Google Analytics global site tag (gtag.js) code snippet directly into your site's header. You can get this snippet from GA (Admin > Data Streams > Your Stream > View tag instructions).
- Via Theme Editor (Risky): Adding it to your theme's header.php file (Appearance > Theme File Editor) is not recommended. It can break your site if done incorrectly, and changes are often lost when the theme updates.
- Via functions.php (Slightly Safer): Adding the code via your child theme's functions.php file is better but still requires coding knowledge.
- Via Code Snippet Plugin (Recommended Manual Approach): The safest manual way is using a plugin like "Insert Headers and Footers" or "WPCode" to add the gtag.js snippet to your site's header section without touching theme files directly.
Unless you have specific reasons and technical expertise, stick with Method 1 (Plugin) or Method 2 (WordPress.com built-in) for simplicity and safety.
Step 4: Verify the Connection Works
Google Analytics reports aren't always instantaneous (except for the Realtime view). Allow some time for data collection to begin.
- Check Realtime Report: Log in to your Google Analytics account. Navigate to Reports → Realtime. Open your website in a different browser window or on your phone. Within a minute or two, you should see activity appear in the Realtime report if the tracking code is active.
- Wait for Standard Reports: Standard reports can take 24-48 hours to fully populate with data after the initial setup. Be patient!
- Double-Check ID: If nothing appears after 48 hours, re-verify that you copied and pasted the correct Measurement ID without errors.
Enhanced Ecommerce Tracking (For WooCommerce)
If you operate a WooCommerce store, enable Enhanced Ecommerce tracking for detailed sales and product interaction data:
- Enable in Google Analytics: Go to Admin → Ecommerce Settings (in the Property column). Turn On both "Ecommerce Settings" and "Enhanced Ecommerce Settings".
- Enable in WordPress: Your chosen plugin (like Site Kit or MonsterInsights with its Ecommerce addon) or the WordPress.com setting (if applicable) will usually have specific toggles or setup steps to enable passing ecommerce data to GA. Consult your plugin's documentation.
Frequently Asked Questions
- Why aren't my visits showing up immediately? Standard reports need time (24-48 hours). Use the Realtime report for initial verification. Also, check your Measurement ID for accuracy.
- Why do GA numbers differ from my other stats (e.g., Jetpack)? Different tools use different tracking methodologies. Minor discrepancies are expected. Focus on trends rather than exact number matching.
- Where can I learn more about using Google Analytics? The official Google Analytics Help Center is the best place to start.
Conclusion
Successfully figuring out how to add Google Analytics to WordPress is a crucial step towards data-informed website management. Whether you opt for the simplicity of a plugin like Site Kit or MonsterInsights, or use the built-in WordPress.com feature, connecting GA empowers you with the insights needed to understand your audience and optimize your site's performance. Start tracking today and unlock the potential of your website data!
- Quick Links
- Homepage
- Projects
- About Us
- What we do
- Careers
- Services
- Product Dev
- MarTech
- Data Analytics
- Our Products
- TrakNeo
- pURL
- Breathe India
- Arivu
- LIFI